skip to Main Content

A Low Cost and Green Option for Landscape Waste

Many families talk about going green by making purchases. They may consider purchasing a car to lower their carbon footprint, adding solar products and panels to their home or getting some other expensive green product that makes them feel like they are being more environmentally aware. What many don’t realize is that green living doesn’t always involve purchasing something else. In fact, it can be as simple as repurposing an existing object.

Our home sits on an acre of land. Lawn clips are left on the ground to break down naturally and fertilize the grass. However, at least twice a month, the hedges and trees need to be trimmed and the weeds need to be pulled. To accomplish this task it takes not only hours of work, but it also generates a large pile of yard debris. While composting could be an excellent solution, it is not an option for us to do our homeowners association rules and regulations. Thankfully, our city does offer yard waste only collection days and tries to dispose of what it collects in an environmentally conscious way.

While many of the homeowners in our development fill plastic bag after plastic bag with their yard waste for these special collection days, we feel that it is not only a wasteful practice to use the plastic yard waste bags, it’s expensive. Always looking for ways to cut our household budget, we have seldom used the plastic yard waste bags. Now that our family is working harder to reduce our carbon footprint, we have recognized that these bags are petroleum based products and are not environmentally friendly, as they will probably be on the planet longer than our family and our children. Because of this, we certainly will no longer purchase them.

In our household, we avoid using these products by using our regular trash bins and recycling containers for our yard waste. Over the years we have accumulated six garbage cans. We had bought two new containers when we rented a home and we inherited the previous owners four cans when we purchased our current home. While having several trash cans helps us to avoid using plastic bags for our yard waste, some weeks we end up with more yard waste than cans. Even then we do not resort to the plastic bags, we simply fill our two recycling bins with any excess weeds, twigs and hedge trimmings.

Fortunately, our collection day for yard waste is on Monday and we are able to do our yard work on the weekend. Once the yard waste has been collected, we can resume normal use of the bins for our regular household trash and recycling throughout the rest of the week. Any unused bins are stacked together during the week so that they don’t take up much space.

This is probably the simplest, most cost effective and green act our family could ever have implemented. It’s just another example of how green living doesn’t have to be expensive.

If you are looking for the best landscaping service in Chicago Land Area. Search in Google Search Engine “landscaping near me” you will find some of the best landscapers in the area.

A lot of people are wary about Arizona bathroom remodeling, thinking that the home improvement project will entail a lot of their time and money. While this may be true for those who want to replace just about every furnishing in their bathroom, this isn’t necessarily the case for most.

The most important thing that you need to do in order to stay within your budget is planning. You need to come up with ideas on what renovations you actually want to do. Does your bathroom just need a lick of paint? Do you need to replace the bathtub? Is your sink cracked? You will need to determine what you actually want done on your bathroom instead of jumping into it and ending up wasting a lot of money on unnecessary materials.

Next, you will need to set a budget. If you currently have financial difficulties and you want to remodel your bathroom primarily for aesthetic reasons, maybe you can put off the renovations at a later date. However, if you have enough money in order to pay for some work to be done, then do so, but plan your budget accordingly. You’ll not only need to purchase materials like granite and marble, you might also need to pay specialists, like plumbers and electricians, to do the work for you, especially if you’re planning for an extensive remodeling. Add an extra 10 to 15% to the initial costing in case eventualities may occur that might necessitate making extra expenses.

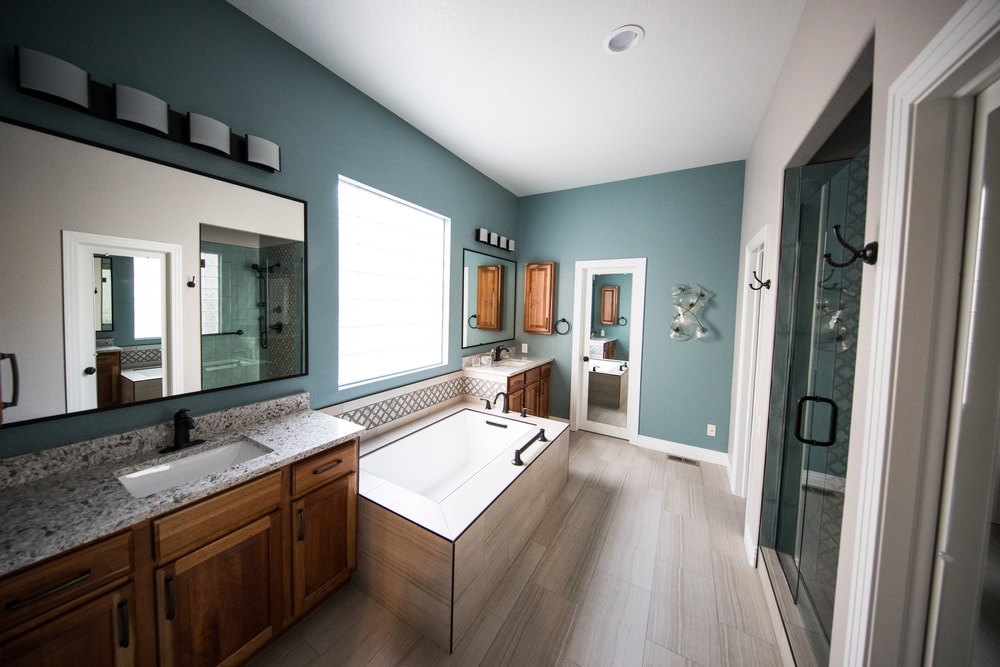
Lastly, think of the design that you want for your bathroom. Make sure that the remodeling will not clash with the decor of the rest of your house. You can browse through magazines or go to websites to get an idea on the different bathroom styles.

Bathroom renovations don’t have to be expensive! Just a few tweaks and modifications can do wonders in improving the appearance of one of the most important rooms of the house. As long as you do it the right way, you can actually get the bathroom of your dreams without going above your set budget.

Hang a picture here, one there and yet another one over there. Makes the room look great, until you decide to change the location of the pictures and you are left with small holes in the wall caused from nails and hangers. Or maybe the hole is slightly larger than a nail hole and needs to be repaired without having to replace drywall and re-painting. Can it be done? Sure, just use these tips for DIY drywall repair.

Small Hole Repair

Toothpaste is your go-to DIY repair product for small nail holes in both smooth and rough textured walls. Use white toothpaste (not gel) and dab in into the hole until it’s full. Smooth with fingertip to blend in with a smooth wall or leave as-is to blend in with a rough texture. Allow toothpaste to dry then cover with a dab of wall paint to make the DIY drywall repair invisible.

Large Hole Repair

Someone get mad and punch a hole in the wall? Clear away any drywall debris from the hole and cover hole with drywall tape, white or tan duct (duck) tape. Apply a thin coat of drywall putty over tape and smooth it down with a putty knife, being sure to cover tape completely but not thickly. If wall is textured, place putty knife blade flat against the wall putty and lift up all across the puttied area to create little peaks. Allow drywall putty to dry, lightly sand with fine grain sand paper to achieve the texture needed to blend in with the rest of the wall, then paint.

Even Larger Hole

We won’t speculate on how that large hole was made in the drywall, but we will give you tips for fixing the hole in the wall. Take a box knife and cut away the broken pieces and remove debris. Cut in straight lines and aim to make a simple shaped hole like a square or rectangle. Measure cleaned-up hole then measure, mark and cut a new piece of drywall 1/8 inch smaller all around. Fit the new piece of drywall into the hole. It should fit snuggly and can be tapped gently into place. Whittle down to size any errant corners or sides with the box knife. Apply drywall or duct tape around all sides, then apply a thin layer of drywall putty over the tape. Smooth out and let dry, then paint to match the rest of the wall. If the wall is textured, apply wall putty over the entire new piece of drywall and create texture with a putty knife as described under ‘large hole repair’. Let putty then apply a coat of wall paint.

Prepare to Remodel Your Bathroom

If you plan to remodel your bathroom, you need to make a solid plan based on your current and future needs. For instance, you need to plan for the aging process. Your bathroom is one of the most used rooms in the house, and as such, it needs to provide ease of access and use to you.

Do It Yourself? 
As handy as you might be, there are some areas that should be taken care of by a professional. For instance, if you aren’t a plumber, it’s better to hire one to do the remodeling job than to hire one to repair your remodeling job. Most professional plumbers offer a guarantee on their work, something that can be invaluable to a homeowner.

Other jobs that you might want to hire a professional for would be tile installation and electrical work. Remember that you aren’t going to want to remodel the bathroom again for many years, so you might as well hire a professional to make sure it gets done right the first time.

Steps to Plan For 
Before you actually buy anything or hire anyone to do the job, make sure you have a solid plan overall. Some of the things you need to look at changing would be your walls, flooring, sink, tub, light fixtures and cabinets. This is a job you want to do all at once. Don’t go buy a tile that strikes your fancy only to change your mind when you buy a sink or tub of a different style or color.

Before you take anything out of your bathroom, make sure to turn the water off. If you don’t have shutoff valves to your sink, toilet and tub, you’ll need to shut the main water line off, and then put shutoff valves on the items that are missing them. Otherwise you’re going to have to have the water off to the entire house for the duration of the remodeling job. You should always have individual shutoff valves installed on any item that involves running water anyhow.

Once the water is shut off, you’re going to need to remove the toilet, sink and tub. If you aren’t replacing these items with new ones, only remove the toilet so you can have access to the floor tiles if you’re putting new tiles in.

Shut the power in the bathroom off by shutting off the breaker that leads to the bathroom. You don’t want to simply switch the light off because there will still be power going to the switch itself. Shutting the breaker off prevents power from going to the bathroom at all. If you’re changing the wall panels or the light fixtures, you’ll need to remove the switch plate covers and light fixtures.

If you are replacing wall panels, you’ll need to remove the old ones first. You’ll also need to remove the floor covering if you’re planning on putting in new tile or linoleum. Once you’ve removed all that you need to, clean the area completely. Remodeling in the middle of a mess is a sure way to ruin the job and increase the level of frustration.

When you start putting the new items in the bathroom, start with the floor. Everything else in the bathroom depends on the floor. Make sure to repair any soft spots and level the floor before you do anything else. Once the floor is complete, complete the repair or replacement of the wall material. Once the walls and floor are done, you can begin installation of the other items in the bathroom.

Check out Custom Stone Countertops in Chicago Land Area – At RG Stone Countertops we custom stone work for Kitchens, Bathrooms, Fireplaces, Bars and more!

Green Cleaning Products Save Money: Reduce Spending by Using Natural Cleaning Agents in your Home

Using natural cleaning products is a surefire way to save money. Not only do they it curb expenditures on expensive chemical-based detergents and cleaners that grace supermarket shelves, they are also safer to use for the home. Green cleaning agents are gentler on the family as well as the environment. Here are the basic two cleaners that every homemaker needs for their home.

Vinegar

  • Vinegar added to water makes an excellent cleaning agent for the floor, rattan furniture, windows and mirrors.
  • To clean the floor and wooden furniture, mix vinegar and water into a pail and use a mop or cloth to clean the hard surface. Wipe over the surface with a dry cloth. For complete effectiveness, try to ensure that mixture is comprised of equal amounts of vinegar and water.
  • To clean windows and mirrors, add the two to a hand-held spray bottle and do the same. In fact, using the same solution on mould and mildew helps remove the fungus to ensure attractive walls.
  • Vinegar can even help remove stains from curtains, sofa fabrics and carpets. Dip a wet cloth into vinegar and blot out the undesirable marks. If this does not work, try borax on the stains and allow them to settle. Follow-up with blotting with vinegar on a damp cloth.

Baking Soda

  • Baking soda works well in the dining, kitchen and bathroom where the stains are more water-based.
  • Sprinkle some baking soda into warm water and clean the dining table. The solution is only mildly abrasive, so it should not harm the furniture.
  • In the kitchen, sprinkle baking soda onto the surface and wipe over with a damp cloth. If there are stains and crusts in your microwave or oven, baking soda will also help remove them when the microwave or oven is still warm. Wipe thoroughly with a warm cloth.
  • Foul odour from the garbage bag can be eliminated by pouring in some baking soda before the garbage begins accumulating.
  • Lastly, baking soda on the porcelein in the bathroom will help remove unwanted stains. Scrub with a bristled brush for the best effect. Wash with plenty of warm water and wipe dry afterwards.

The Combination

The combination of vinegar and baking soda can be lethal to dirt and grime. Clean the garbage disposal and toilets by pouring some baking soda down them followed by cup of vinegar. After the solution fizzes, flush it down with a cold water.

With just vinegar and baking soda, ensure a cleaner healthier home without overspending on cleaning detergents.

Source: House Cleaning Services

Back To Top